| Home | About Us | Art Galleries | Photo Gallery|Healthy Eating | Angie's Web| Contact Us |
Art Lesson 3
Inspiration and Its Outcome in Acrylic by Angie McIntosh
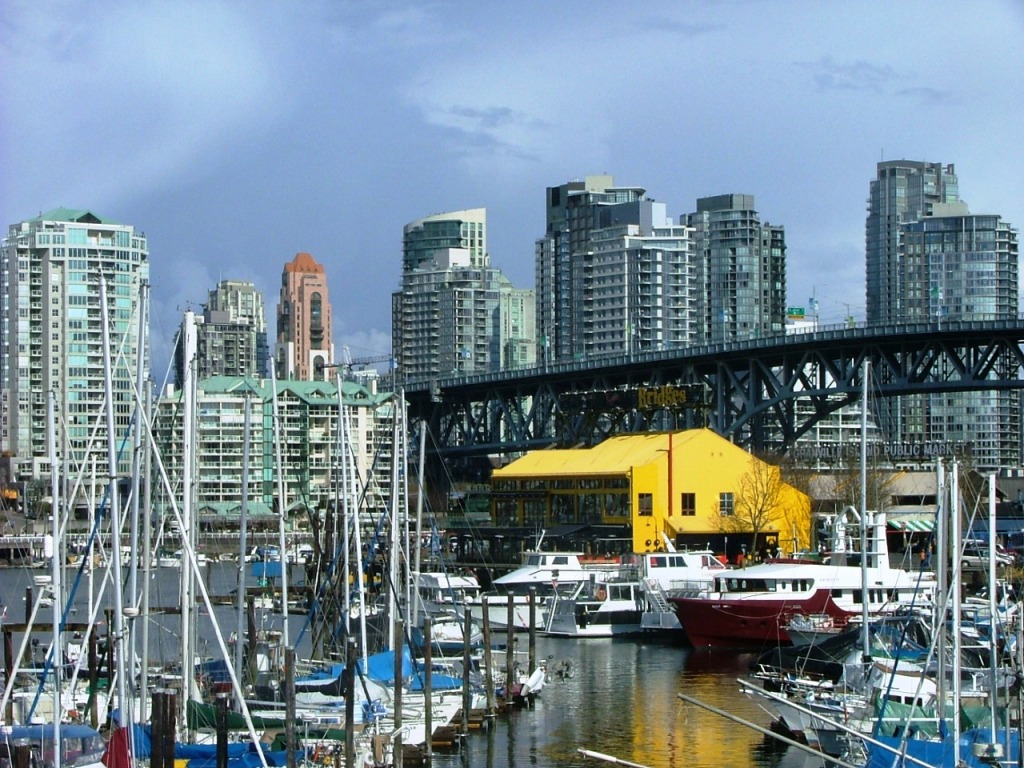 Photo of Harbour at Bridges |
This is
the harbour in front of Bridges Restaurant on False Creek in
Vancouver. I was walking around the area looking for painting
ideas on a lovely sunny day in March--hard to believe it had snowed
there the previous week. I loved the light on the building
next to the large white boats and the buildings reflection on the
water. The whole large scene is lovely but very complicated to
paint what with all of the sail boat masts, the bridge, and the sky
scraper in the background. I will paint my work in acrylic.
The process is very different from watercolours although the basic
composition and design principles are totally the same. |
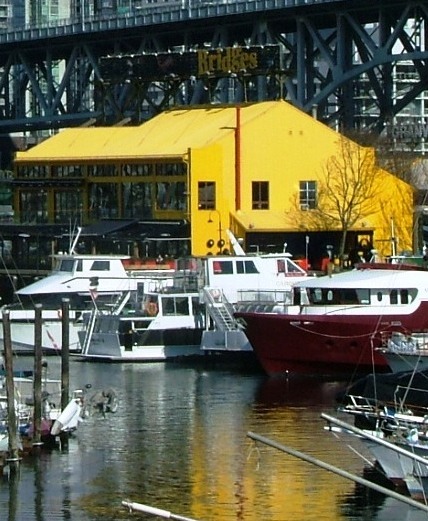 Crop the Image to get Composition |
I
decided that I must simplify the scene and so removed the blue sky,
busy sky scrapers from the top. I also zoomed in and eliminated
all of the busy masts from the sailboats located on the left and the
right of the scene. Although the Granville Street bridge supports
are quite busy and complicated I decided I should leave them in to give
the painting a real feeling of the market area below the bridge.
However I would paint them in a loose and suggested fashion so they
wouldn't take away from the main parts of the scenes being the yellow
building, boats, and reflections. |
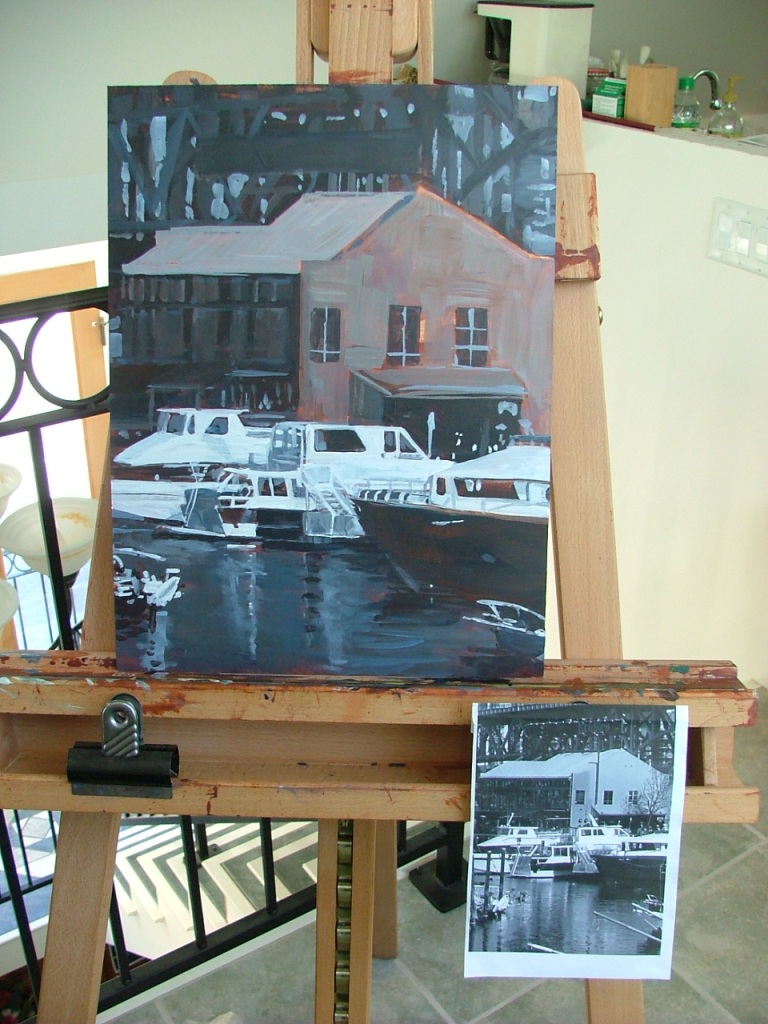 Understudy of Painting |
TONAL UNDERSTUDY Here I have done the tonal
understudy of the painting. This provides the artist with the correct
values of the painting before laying in the colours. By getting
the underlying values correct the painting is almost guaranteed to
work. That is why you must have a very good subject to paint from
with the lightest lights to the midtones, the darks and darkest
darks. Normally artists will squint alot at a scene if they're
painting outdoors or if looking at a colour photo. This blurring
of the eyes helps to eliminate colours and details so that you can get
the big pictures of where to put your lights and darks. Here to
make it easier I printed a black and white of my image to work from.
|
 Close Up of Underpainting |
Process of Painting The method I use for
painting works really well on canvas. This time I was working on
board which provided some challenge as it dries too quickly on the
initial wash on the dry board which sucks the moisture out of the
paint. I would recommend working on canvas. First you
carefully study the value pattern and placement of shapes in your
picture. Then you tone your whole canvas with a fairly watery
mixture of burnt sienna. Using a slightly damp flannel rag you
wipe off you lightest lights (didn't work too well on board so I added
them back with paint later). The initial toning of canvas with
burnt sienna serves as your mid value. Then you darken your
sienna with french ultramarine and paint darks.
|
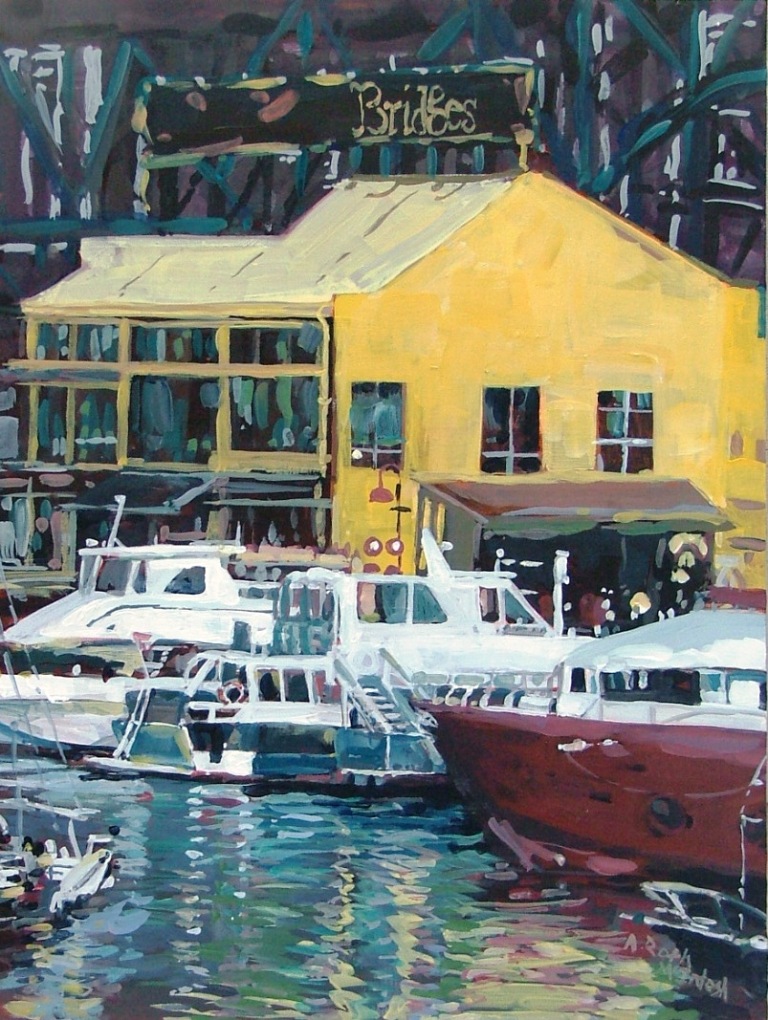 Finished Painting 12x16 Acrylic "Bridges" |
Continued--Due to the
difficulties with the drying board I had to add some of the lights back
into the water. Once I am happy with the tonal underpainting I
start laying in the colours working from the darkest to the
lightest. Then I painted in the reflections and finished up with
the details. Notice how I lightened up the overlying dark shadow
on
the left side of the building which the camera had darkened too
much.
I learned my acrylic technique from a wonderful Victoria, BC, Canada artist, Brian Simons. He offers workshops just about every month. I would recommend anyone study with him if you'd like to learn a confident acrylic technique. Visit his website www.BrianSimons.com. |
| Contact the artist angiemcintoshatshaw.ca (replace the at with @) |
Be Part of the WorldArtTours.net Network!